The following example illustrates painting a radiating gradient inside of a
selection to paint the front cover of a folder icon.
Preparing
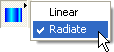
Press and hold down the Gradient tool button to display the
gradient menu. Select the Radiate gradient option.
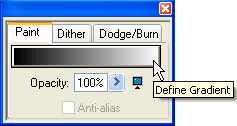
The Paint tab on the Paint Modifiers tool window
now displays the Define Gradient button with the current gradient. Click
the Define Gradient button to access the Define
Gradient dialog.
Use the Define Gradient dialog to Load the
Foreground-to-Background gradient definition.
Set Color A (foreground) and Color B (background) colors
to the desired beginning and ending colors of the gradient. In this
example, we'll set Color A to the lighter shade of yellow at the
top edge of the folder and Color B to the darker shade at the bottom
edge.
Painting
The Gradient tool requires a current selection to define the boundary
of the gradient paint. Painting without a selection will fill the
entire image area.
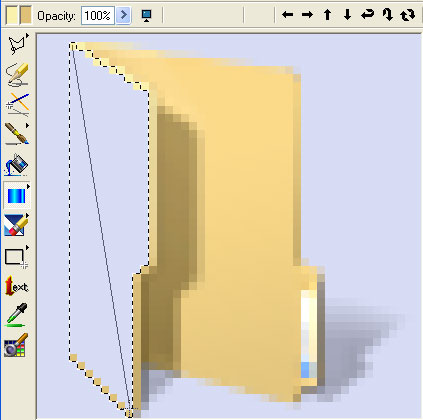
Begin by creating a selection to define the boundary where
the gradient will paint. In this example, we used the Lasso selection
tool to create an outline for the folder cover.
Select the Gradient tool. Position the drawing
cursor in the edit window at the upper left corner of the selection
(the beginning of the "radiate" gradient).
Press the left mouse button down to begin the gradient and then
move the cursor down to the lower right corner of the selection.
Release the mouse button to paint the gradient.
Drawing gradient in the selection
 |
|
Icon editor provides gradient blend
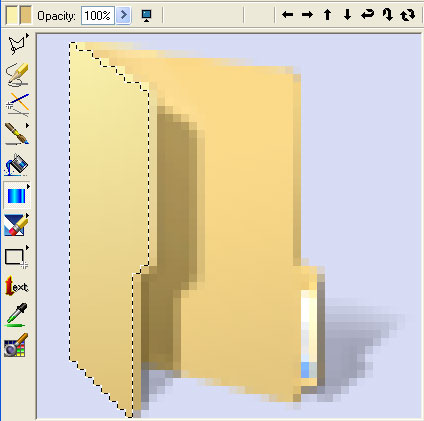 |
As you can see, gradients add depth and photo-realism to your icons, and
creating gradients is easy with Microangelo!